
Medical Supplies
Your gateway to expert advice on all things medical supplies
-
April 11, 2024
Downtime: the archnemesis of uptime. When your packaging and shipping department experiences downtime, it can bring your entire operations to a screeching halt. This, in turn, results in prolonged deliveries, customer dissatisfaction, and a significant loss to your bottom line.
Packaging downtime is an unfortunate inevitability for any company. However, there are several ways you can minimize downtime so your business can perform at the optimum level. In this highly functional article, we will cover four ways you can keep packaging downtime at bay.
Practice Preventive Maintenance
A common phrase you’ll hear in health care is “prevention is better than cure”. The same principle applies to your company’s packaging operations: preventing downtime is a lot easier—and cheaper—than resolving it.
Like with any machinery, your packaging equipment can only run continuously for so long before they start to develop problems. And if you’ve got older equipment, they’ll develop their problems sooner than later. To combat this, schedule inspections on a weekly to monthly basis to examine the condition of your equipment.
Make sure you also set up comprehensive maintenance checklists so that each and every component of your equipment is verified to be in top working order. At the same time, make sure your maintenance team is given enough time to thoroughly check over the machines and provide detailed records of their maintenance checks.
Measure Optimum Output During Uptime
You may learn more from your failures than your successes, but your successes still provide some worthy insight into how your operations should function. When your packaging and shipping operations are running smoothly, develop some key performance indicators (KPIs) and take measurements on how things are performing.
When developing your KPIs, ask yourself the essential questions: how many packages or pallets are shipped out an hour, or a day? How long does it take for an item to go through the entire packaging department? Are there any areas or systems that can be improved to increase your output?
With a solid set of KPIs and careful measurement of your operations, you can determine what optimal output looks like so that when downtime strikes, you’ll notice it immediately and then determine the source of the downtime more easily.

Have Spare Parts Stocked Up
Even the best-made plans can go awry. Machine parts, especially those in constant motion, will wear down over time. These old and faulty parts will impair the machine’s performance, or worse, break it. When your parts are well past their prime, they need to be replaced.
A stockpile of spare parts can be a lifesaver in moments of downtime. Thankfully, most manufacturers of industrial equipment are more than willing to sell replacement parts for their machines. Just make sure you have the manual or reference guide with parts numbers at the ready so that you can request the right parts.
Plan Your Budget for Upgrades
Nothing lasts forever, especially not industrial machinery. When your packaging equipment reaches the end of its operational lifespan, it needs to be replaced. However, industrial equipment can be incredibly expensive and perhaps unfeasible if you cannot budget for it.
If maintenance discovers that a piece of equipment is on its way out during a routine maintenance inspection, or the equipment is getting close to the manufacturer’s recommended lifespan, plan early for expensive upgrades. At the beginning of the fiscal year, set aside a percentage of the yearly budget to go exclusively to upgrades and repairs.
A new piece of industrial equipment can be costly, but a critical failure will be costlier.
Cut Down Your Downtime
Life comes with three guarantees: death, taxes, and downtime. Even the world’s most successful businesses, like Amazon, Apple, and General Motors, will encounter packaging downtime that can stop operations in their tracks. The name of the game isn’t making sure you never have downtime—it’s keeping downtime to an absolute minimum.
Preventative maintenance and spare parts are crucial for addressing downtime in the heat of the moment. At the same time, taking measurements during uptime and planning for upgrades can go a long way toward staving off future downtime as much as possible. Your ability to handle downtime all comes down to how prepared you are for it.
For further reading on managing your packaging operations, be sure to check out our article on why you may need to improve your operations with a stretch wrap machine.
-
April 09, 2024
It’s easy to underestimate the importance of a good morning routine. Many people will give themselves just enough time to wake up, slug back a cup of coffee, dress for the day, and hit the road. And while this tight and bare-bones routine may work for some, it won’t work for everyone.
A good morning routine that works for you will not only boost your energy and productivity for the day, but will also give you an opportunity to take care of things you may not otherwise have the time for. On top of this, it just feels good. Whether you’re an early bird or a night owl, here are some basic steps you can take to ensure that you’re primed and ready for your day.
Prepare the Night Before
Did you know that a good morning routine starts the night before? After all, your nighttime habits don’t just impact your morning—they affect your whole day. You should establish a healthy end-of-day routine to calm your mind and ready yourself for a good night’s sleep.
For starters, avoid eating within 2-3 hours before going to bed. This will give your body enough time to digest your food, thereby calming your stomach so it doesn’t bother you throughout the night. You definitely need to watch out for sugar, caffeine, and alcohol, as these can be very disruptive to your sleep.
Similarly, you should avoid using your phone or watching TV 2-3 hours before bedtime. Not only do these devices keep your mind stimulated with an unending stream of engaging content, but the blue light they emit inhibits the body’s ability to produce sleep-inducing melatonin.
Lastly, develop some habits to let your brain know that it’s time to go to sleep. Whether it’s putting on a comfortable set of pajamas, brewing a calming herbal tea, or spending an hour reading your favorite book, establishing a healthy pattern for ending your day reminds your brain that it’s time to go to bed.
Get a Good Night of Sleep
A good night’s sleep is essential to your health and well-being. For one, good sleep improves your mood, focus, and productivity going into the day.
But more importantly, sleep is critical for your mental and physical health. A good night of sleep keeps your heart healthy, your immune system strong, and your metabolism in excellent condition. Furthermore, good sleep helps in managing depression and anxiety.
Make sure your bedroom is conducive to good sleep. Keep the room dark and at a regulated temperature, around 65°F (18.3°C) for adults. Also, you ought to keep your phone, laptop, and other similar electronics in another room. If you use your phone as your alarm, you may want to consider purchasing a standalone alarm clock.

Avoid the Snooze Button
You’ve likely heard this advice a thousand times over, but you’d be surprised how risky hitting snooze can be. You may be in a state of deep sleep right when your alarm wakes you. Although you may intend to get an extra five minutes by hitting snooze, your body is determined to get more and you may end up sleeping a lot longer than you intended.
But even if you avoid oversleeping, staying in bed longer than necessary can induce grogginess and fatigue that you’ll have to carry with you through the whole day. On top of this, you may be disturbing your body’s natural sleep cycle and setting yourself up for sleep deprivation later that night.
Drink Some Water
There’s nothing wrong with a hot cup of coffee or tea to start your day. In fact, many will tell you that the warm beverage and spot of caffeine helps to wake you up and stimulate your mind. However, you should consider chasing that hot cup with a refreshing glass of water.
Firstly, a glass of water helps to replenish your body’s fluids. Throughout the night, your natural bodily functions will slowly but surely dehydrate you. This dehydration is compounded by nighttime visits to the bathroom or a round of drinks the night before. Restoring your bodily fluids keeps the fatigue that dehydration induces at bay.
Additionally, water in the morning helps to stimulate your mind and digestive system. For more information on the health benefits of a glass of water in the morning, check out this article from Real Simple.
Breakfast or Not?
Is it the most important meal of the day? This is actually quite the subject of debate, with supporters on either side making their case.
Those in favor of breakfast in the morning proclaim that it jumpstarts the body’s metabolism, literally “breaking the fast”, and giving the body the vitamins and nutrients it needs to have that energy boost early in the day. Furthermore, those who regularly start their day with breakfast are reported to be at a lower risk of heart disease, high blood pressure, and stroke.
However, an increasing percentage of adults are choosing to skip breakfast. These people often participate in intermittent fasting, where they restrict themselves to eating during a designated period of the day, then fasting for the majority of it. Intermittent fasting reportedly boosts fat burning, repairs damaged cells, fights inflammation, and help manage symptoms of type 2 diabetes.
In the end, there’s no clear-cut answer. If you think eating breakfast helps start your day, stick with it. If not, skip it. If you want, you can try starting some days with breakfast and some days without and see what works for you.
Get Moving
When you’re fresh out of bed in the morning, you may not enjoy the thought of moving around all that much, let alone a full-on workout. But a session of light exercise can do wonders for waking you up and getting you ready for the day.
Exercising early in the day increases your body’s blood flow and quickly delivers oxygen to the brain, which promptly kickstarts your metabolism and cardiovascular system and fights off the morning grog. Furthermore, morning exercise encourages a healthy and active lifestyle.
If you can afford the time, a morning jog or yoga session is a great way to start the day. However, if you’re crunched for time, try out this 10-minute exercise routine from HealthXchange.

Meditate
Mornings seem to be focused on the “get up and go”, but our mornings can also be a moment to briefly stop and breathe. Practicing stillness and mindfulness at the start of the day can go on to lower your stress, focus your thoughts, and manage your emotions.
Your morning meditation can be as simple as putting on some calming music and going over some positive affirmations (I am enough, I am grateful for the life I have, I have the power to achieve my dreams). There are also countless guided meditations on YouTube and mindfulness apps like Calm and Headspace that you can try.
At the same time, you may want to avoid the news and social media in the early morning. These can be sources of carefully curated negativity that can greatly impact your mental state going into your day.
Plan Your Day
“Plan your work and work your plan”, as they say. Planning for the day ahead of you gives you a sense of purpose and a set of tasks to focus on, whether you’re at work or you have the day off. Is there an important project you need to chip away at? Is there something you’ve been putting off? Is there an idea you’ve had for a while? This is the time to decide what your day will look like.
Making a to-do list can help to regiment your day. With this list, you can assign certain parts of the day to certain tasks, helping you both stay on schedule and give you a concrete sense of accomplishment. It can also deal with more frivolous decision-making, such as when you’re taking your coffee break or what you’re going to have for lunch.
“Eat the Frog”
No, we’re not asking you to literally eat frogs, unless you’re a professional connoisseur of frog legs. This phrase comes from a quote by the author Mark Twain: “If it's your job to eat a frog, it's best to do it first thing in the morning. And if it's your job to eat two frogs, it's best to eat the biggest one first.”
Frogs, in this instance, are tasks and responsibilities. In essence, Twain declares that it’s best to do your hardest task first thing in the morning. That way, the most difficult part of your day will quickly be behind you. After waking your mind and body up with your morning routine, go ahead and tackle that burdensome report or financial statement and get it out of the way. You’ll thank yourself in the afternoon.
Rise and Shine
Mornings are something many of us don’t give much thought to—it’s simply a transitional period between night and day. However, our mornings are incredibly important. Put simply, a good or bad morning can make the difference between a good or bad day. And a strong morning routine helps us make the most of it.
We’re not all going to have the same morning routine. After all, we’re all unique individuals, mentally and physically. But that’s also the beauty of it: we can custom-tailor our mornings to meet our specific needs. Whether or not you eat breakfast, or you have a particular time of day that your body is most accustomed to waking up at, you can create a morning routine that works just for you.
For further reading on establishing a healthy lifestyle, check out our article about staying active at work.
-
April 05, 2024
Packaging can be quite stressful, but perhaps not in the way you’re thinking. While you may be dealing with the stresses of deadlines, customer demands, and daily operations, your packing tape will encounter a different kind of stress: adhesive stress.
Adhesive stress refers to how the adhesive bond is pulled, stretched, and otherwise deformed when acted upon by external forces. In this sticky article, we will go over the five types of stress your tape will face throughout packaging and shipping.
Tensile Stress
Tensile stress occurs when the adhesive bond is elongated or pulled apart by external forces moving away from each other. The direction of the pulling is perpendicular to the bond and the stress is distributed evenly across the surface.

Compression Stress
This is the inverse of tensile stress, where the bond is compressed or smushed by external forces moving toward each other. Like tensile, the direction of the stress is perpendicular to the bond and is distributed evenly.

Shear Stress
Unlike the previous two, shear stress involves external forces moving across each other, parallel to the bond surface. This stress stretches the adhesive bond laterally. Despite the change in direction, the stress is still evenly distributed across the bond surface.

Cleavage Stress
Cleavage stress involves external forces pulling apart one side of the bond while the other side experiences little to no stress. While the previous three stresses are evenly distributed across the entire area of the bond, this stress is uneven and concentrated on a single side.

Peel Stress
Peel stress is similar to cleavage, as the external forces pull apart one side and leave the other side alone, putting uneven stress on the bond. In this instance, however, at least one of the surfaces is flexible, such as a tape backing. This results in greater stress in the area getting pulled apart, making it a more extreme form of cleavage stress.

Stress Management
Adhesive stress is the challenge all tapes must face. Whether it’s sealing boxes, hanging decorations, or making repairs, tapes must be able to stand up to the forces trying to pull them apart.
At the same time, some specialty tapes, like masking and painter’s tape, are specifically formulated to easily give way to peel and shear stresses so they can be removed quickly and cleanly. So the next time you need to use some tape, consider what you’re using it for and what kind of adhesive strength you need.
While you’re here, be sure to check out our selection of tape products, available in a wide variety of tensile and shear strengths. All our tapes come with free shipping, so you can tackle the challenges of adhesive stress today.
For more information on adhesives, take a look at our article comparing pressure-sensitive and water-activated tapes.
-
April 02, 2024
Whether you’re a construction worker on the jobsite, or a DIY-er looking to improve their home, you want to keep the areas you’re not working on safe from the areas you are working on. The last thing you need when you’re in the middle of a project is your floors getting stained or damaged. That, and a devastating apocalyptic event.
Luckily for you, surface protection tape is available to answer your safeguarding needs. This adhesive film is easily unrolled onto your floors and keeps them safe from debris, stains, scrapes, and other kinds of common damage. However, some important steps need to be taken to ensure that your hard surface or carpet protection tape stays in place and works properly.
Clean the Surface
Before you apply an inch of tape, you need to clean the surfaces you intend to protect. For hard surfaces, dust and sweep to get rid of loose specks and particles. Then, mop your hard surfaces and let them dry before applying the tape.
For carpets, thoroughly vacuum every inch of the surface you’ll be covering with protection tape. If you think you need to, steam clean or shampoo your carpeting and wait until it’s completely dried before placing the tape down. Covering still-moist carpets with this tape can run the risk of developing mildew.
Wear Shoe Covers
Rubber soles and high-traction footwear can pull on surface protection tape and dislodge it from where it was placed. To avoid this, put shoe covers over your footwear.
These plastic coverings have less grip than your shoes, ensuring that your surface protection tape stays in place. Furthermore, shoe covers keep you from tracking dust, dirt, and other contaminants into your work area.
Apply It Carefully
Surface protection tape works in the same way any roll of pressure-sensitive tape does: unwind it and stick it to your surface. However, this kind of tape can be 2 feet wide or more, making it a cumbersome object to deal with.
We recommend two people for this job: one to hold the roll of tape steady and the other to unwind it and press it onto the surface. Make sure you’re both wearing shoe covers and avoid walking on the freshly applied tape as much as possible to give it a chance to effectively bond with the surface. Let the tape set for 48 hours before working and walking on it.
If you’re by yourself, you may want to get yourself a surface protection film applicator, which essentially works like an oversized paint roller.

Can’t Tape It? Wrap It
Surface protection tape isn’t just for floors. In fact, this tape can be used on a wide variety of surfaces, including tables, countertops, large appliances, and more. However, when it comes to small and/or oddly shaped items, surface protection tape may not be up to the task.
In these instances, a roll of hand stretch wrap or mini bundling wrap will do the job. All you have to do is tightly wrap these objects all over in three or four layers of stretch film and they’ll be adequately protected from debris, moisture, and other contaminants. The plastic film clings to itself, so there’s no need for tapes, adhesives, or any other binder to keep it in place.
Don’t Leave It for Long
The acrylic adhesive used in hard surface and carpet protection tape is formulated to not leave an adhesive residue behind upon its removal. However, this only works within 45 days of applying the tape. After that, the bond will have solidified enough to impart a residue on your surface.
Make sure you keep track of when you applied your tape and how long it’s been there to keep your carpeting and hard surfaces free from unsightly residue.
No Scratching the Surface
Surface protection tape is essential for painting projects, renovations, construction, and more. Its light but firm adhesive held by its puncture-resistant plastic backing safeguards floors, carpeting, and other surfaces from unwelcome stains and scrapes. As long as you clean your surfaces, apply the tape carefully, wear shoe covers, and remove it within 45 days, you can keep unnecessary surface restoration off your to-do list.
While you’re here, be sure to check out our selection of surface protection tapes, available in carpet and hard surface varieties. All these products come with free shipping, so you can get to protecting your surfaces right away.
For further reading on protective tapes, take a look at our article comparing masking tape to painter’s tape.
-
March 25, 2024
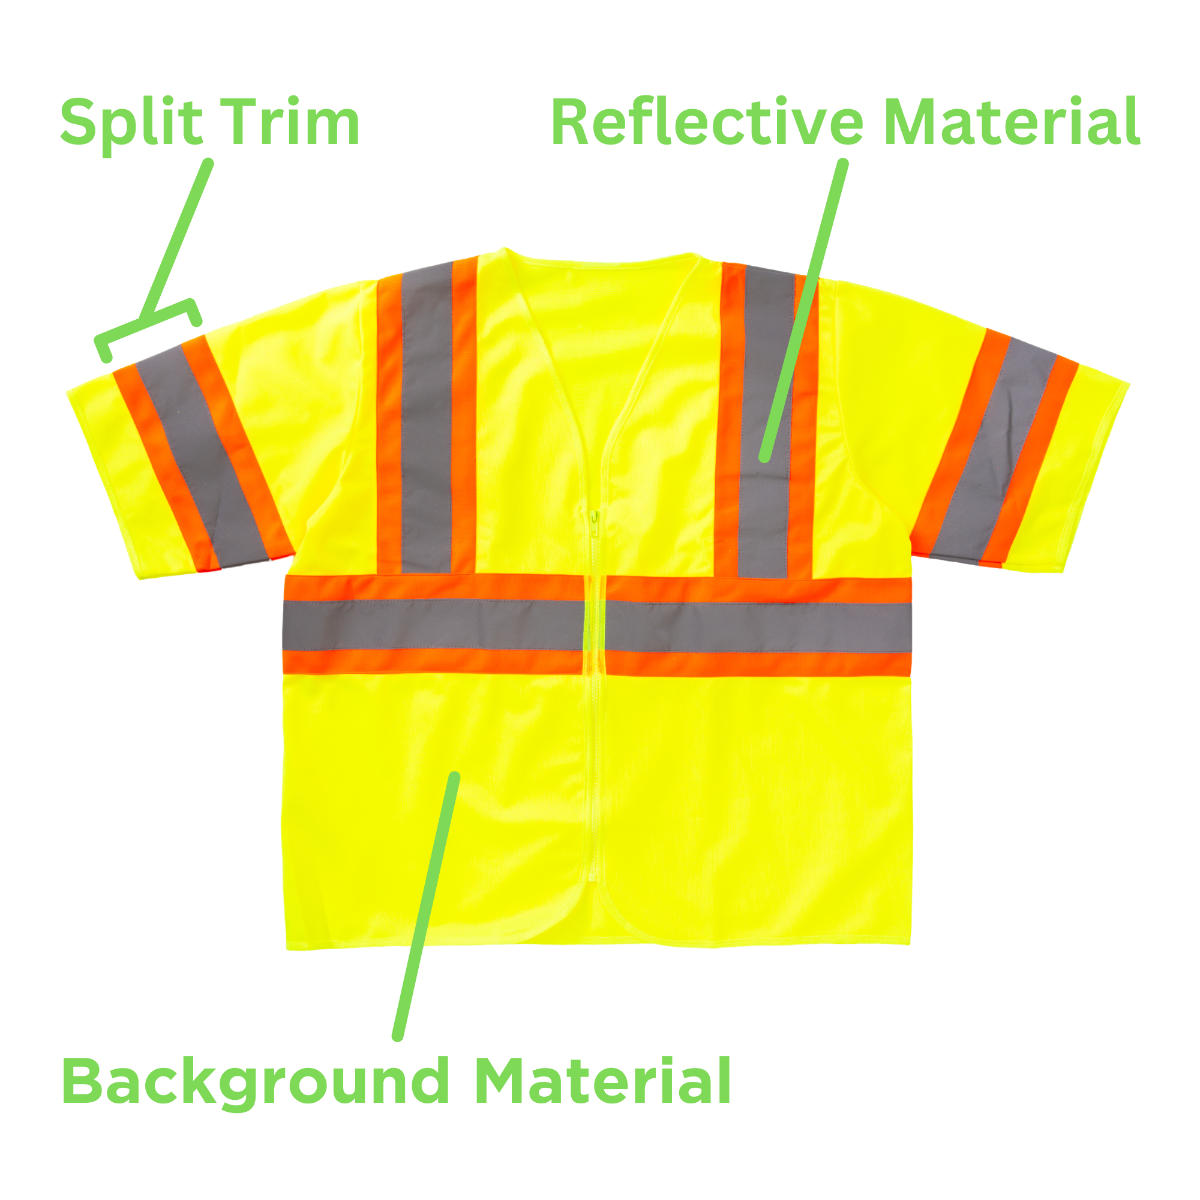
Visibility is essential in high-risk, high-traffic areas. Whether you find yourself working in a warehouse bustling with tow motors and scissor lifts, or repairing a section of highway and standing a few feet away from 60 mph traffic, staying highly visible is not just professional—it could very well save your life. Thankfully, there’s an easy solution to our hi-vis needs: safety vests.
Safety vests are ubiquitous and universal. From crossing guards, to construction workers, and even to emergency responders, safety vests keep essential workers in sight and in mind. But not all safety vests are the same. Safety vests are differentiated by type and class, following standards set by national organizations. In this highly visible article, we will go over the different kinds of safety vests, how to maintain them, and when to replace them.
What are the Different Types of Safety Vests?
Safety vests come in three types, differentiated by who wears them and where they work:
Type O (Off-Road): these safety vests are worn by workers who are not working in roadway environments. However, these workers may still be in high-traffic areas bustling with forklifts, industrial equipment, and other large moving objects that can be a hazard.
Type R (Roadway): these safety vests are for those who work in roadway environments and in close proximity to high-speed traffic.
Type P (Public Safety): these safety vests are specifically worn by fire, police, and EMS personnel working on roadways or other hazardous environments. While similar to type R, type P vests typically have more stringent specifications for background and reflective materials.
What are the Different Safety Vest Classes?
The different classes of safety vests are determined by the American National Standards Institute, or ANSI, which is a private organization that sets voluntary standards for safety and quality. These classes are differentiated by the amount of background material, the amount of reflective material, and color.
 Non-Certified Safety Vest
Not all safety vests are certified by ANSI. In fact, there are plenty of safety vests available for purchase that are not in compliance with ANSI’s standards. But this is no accident, as they are often reserved for visitors and contractors. Non-ANSI safety vests are also favored by long-distance runners who jog in conditions with low light levels, such as early in the morning or late at night.
As these vests are not in compliance with ANSI, there are no hard rules determining the measurements for background and reflective materials. Generally, these vests will feature a band of reflective material going around the middle and/or above each shoulder. The background material can be of any size and color.
 Class I Safety Vest
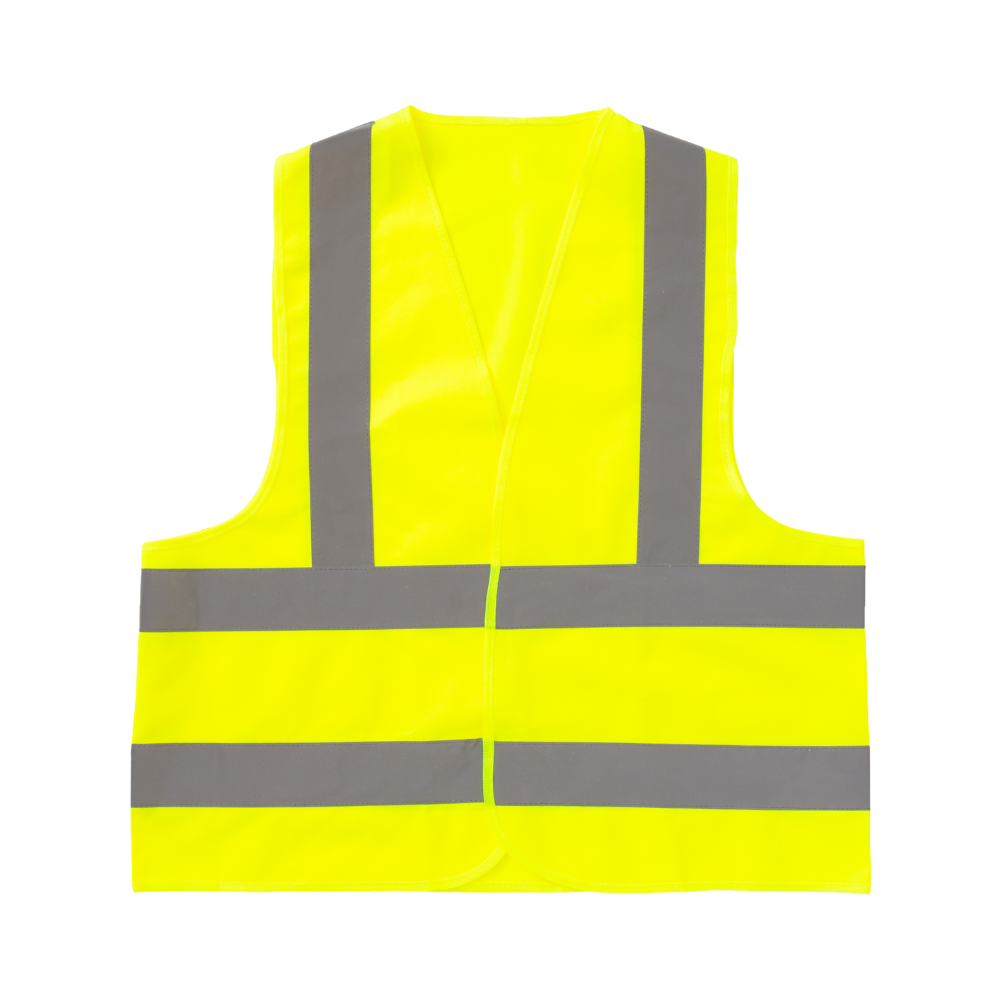
Class I safety vests are exclusively type O vests, meaning that these vests are not for roadway use. However, these vests are worn by those who work in environments with large, moving equipment/machines, such as forklifts and floor cranes, where high visibility is still necessary for safe operations. Class I vests are much like non-certified vests, but with clearly defined regulations for their materials.
Class I vests must have at least 217 square inches of background material in bright yellow or bright orange. These vests must have a minimum of 155 square inches of 1-inch width reflective material that goes around the middle and above each shoulder. Class I safety vests are not permitted for traffic zones exceeding 25 miles per hour.
 Class II Safety Vest
Class II safety vests encompass both type R and type P vests, indicating that these vests are intended for use on roadways with moderate traffic speeds. These vests feature more background and reflective materials than class I vests, especially for type P vests, given the increased need for visibility in areas with higher traffic levels.
Class II vests require a minimum of 775 square inches of background material in hi-vis yellow or orange. The vests need 201 square inches of reflective materials at a 2” width, or 1” if it’s a split-trim design. The reflective materials must go around the middle once or twice and above each shoulder. Class II vests are not permitted for traffic zones exceeding 49 miles per hour.
 Class III Safety Vest
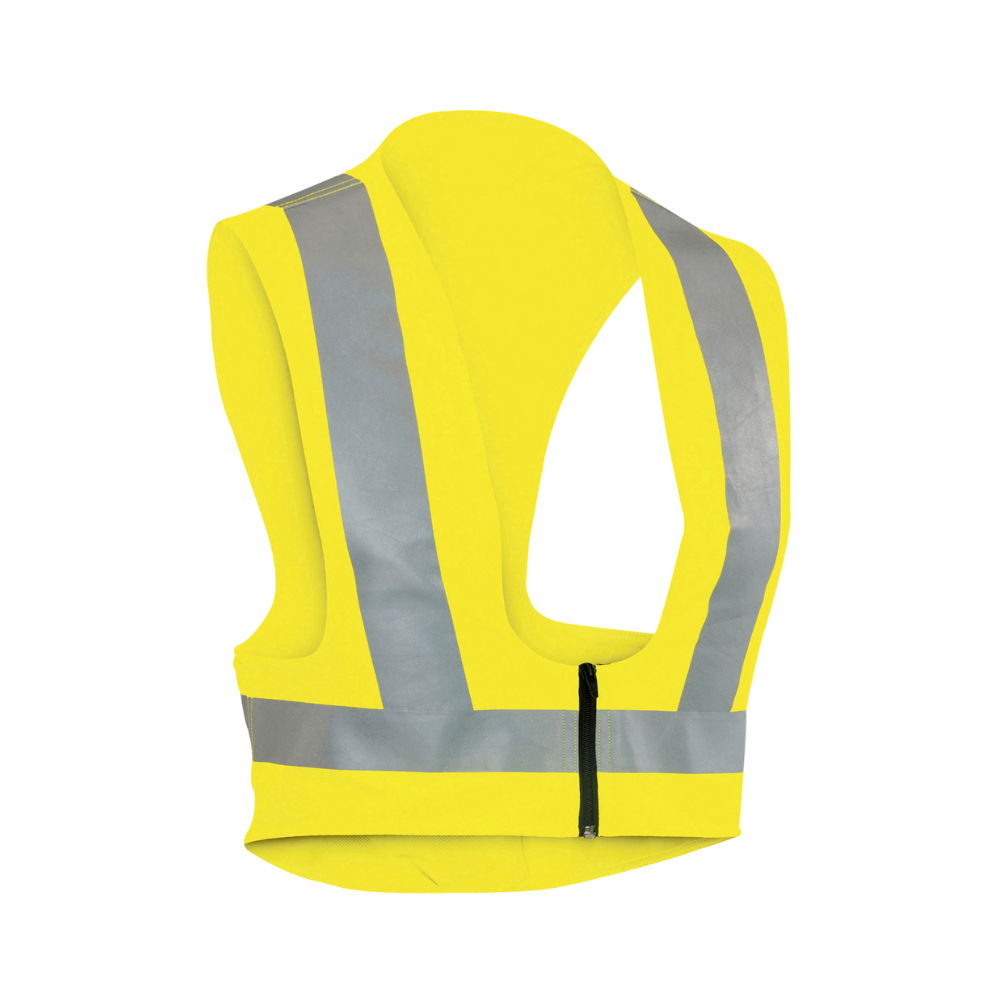
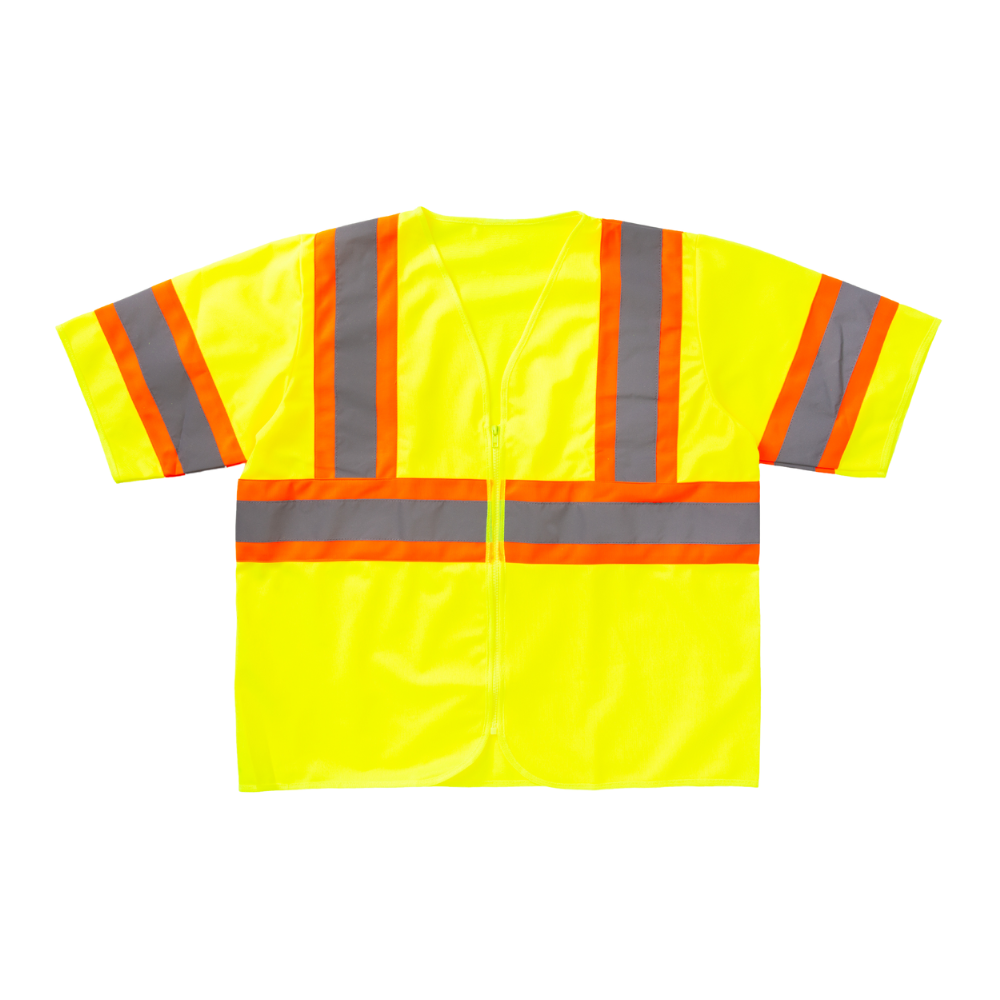
Class III safety vests are the most intricate kinds of hi-vis vests. Like class II, class III vests include both type R and type P vests. However, these vests are designed for roadways with traffic speeds at 50 miles per hour or more. Because of this, these vests have the highest amount of high-visibility materials of all classes. On top of this, these vests are only kind to have sleeves.
Class III vests must have at least 1,240 square inches of background material in bright yellow or orange. These vests need a minimum of 310 square inches of reflective material in a 2” width, or 1” if it’s a split-trim design. The reflective material must go around the middle once or twice, above each shoulder, and around each sleeve. Class III safety vests are acceptable for any kind of traffic zone at any speed.
Class
Image
Types
Background Amount
Background Colors
Reflective Amount
Reflective Width
Sleeves
Traffic Zone
Non-ANSI
N/A
N/A
Any
N/A
N/A
Maybe
N/A
Class I
O
217 sq. in.
Yellow, Orange
155 sq. in.
1"
No
<25 mph
Class II
R, P
775 sq. in.
Yellow, Orange
201 sq. in.
2" or 1" for split trim
No
25 - 49 mph
Class III
R, P
1240 sq. in.
Yellow, Orange
310 sq. in.
2" or 1" for split trim
Yes
50+ mph
How Do I Care for My Safety Vest?
Buying and wearing your safety vest isn’t the end of the story. You also need to properly maintain your safety vest to ensure that it’s working for you. For instance, if your safety vest is covered in mud, its high-visibility properties are significantly reduced, leaving you in danger of being hit by someone who can’t see you.
Most safety vests can be machine-washed. Simply add it to a load with similar colors, select a delicate cycle, and run it with cold water. Mild detergents are fine to use, but a high-strength detergent may rapidly fade the colors. Then, place it in your dryer and run it on low heat. Routine washes will slowly fade the colors over time, so be on the lookout for this.
Due to the materials used to make safety vests, you should avoid ironing or dry cleaning your vest or you may compromise its material integrity.
When Should I Replace My Safety Vest?
Safety vests don’t last forever. The average lifespan of a standard safety vest that is used daily is around 6 months. Premium quality vests or vests worn infrequently can last up to three years depending on their condition and use.
ANSI has color inspection cards to determine the efficacy of safety vests. If your vest does not match the colors on the inspection card, it’s time to replace it. Furthermore, if your vest is damaged or fails to close properly, it needs to be replaced.
Final Thoughts
Learning about your safety vests is no waste of time. In fact, wearing the right safety vest in the right environment can keep you from serious injury or even death. And while ANSI isn’t an official government agency, their standards for personal protective equipment (PPE), safe operations, and more are near-universally accepted by American industries.
Whether you’re a crossing guard, a construction worker, or a fireman, visibility in hazardous settings is essential for your safety and for the safety of others. While class III vests are acceptable for any situation at any traffic speed, they may be overkill if you’re just dealing with golf carts and hand trucks. Take the time to learn what kind of an environment you’re working in to make sure you have the appropriate vest for it.
And while you’re here, check out our selection of safety vests, available in ANSI-certified class II and class III. Our safety supplies come with free shipping, so you can guarantee that you’ll be highly visible in hazardous conditions in no time.
For more information on our safety supplies, take a look at our article going over hard hat classes and best practices.
-
March 18, 2024
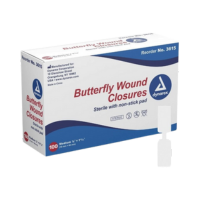
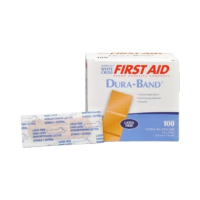
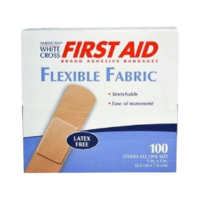
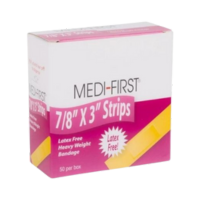
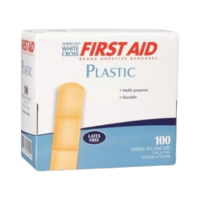
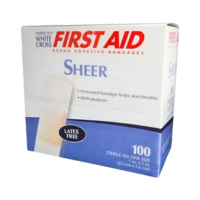
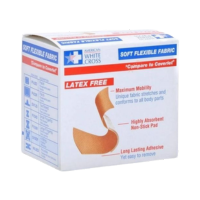
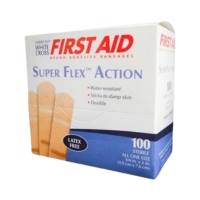
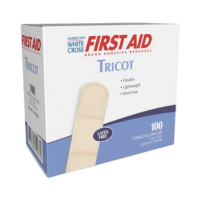
Our Medical Tape & Bandage Products keep wounds protected and hold dressings in place.
What are Adhesive Bandages?
Adhesive Bandages are adhesive.
Our Adhesive Bandages
Product
Image
Sizes
Features

1" x 3" -- 1-3/4" x 2"
Bandage
3/8" x 1-13/16" -- 1/2" x 2-3/4"
Bandage
1" x 3"
Bandage
1" x 3" -- 3" x 2-7/8"
Bandage
7/8" x 3" -- 1-3/4" x 3"
Bandage
3/4" x 3" -- 2" x 4"
Bandage
7/8" -- 1" x 3"
Bandage
3/4" x 3" -- 1-3/4" x 3"
Bandage
3/4" x 3" -- 1" x 3"
Bandage
3/4" x 3" -- 1" x 3"
Bandage
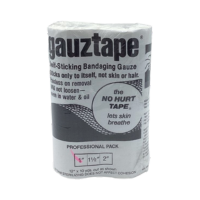
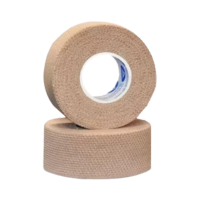
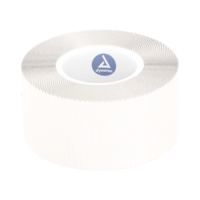
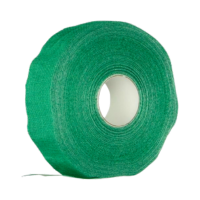
What are Medical Tapes?
Medical Tapes are medical.
Our Medical Tapes
Product
Image
Size
Features
1" x 10 yd
Tape
1" x 5 yd
Tape
1/2" x 10 yd -- 1" x 10 yd
Tape
3/4" x 30 yd -- 1" x 30 yd
Tape
1/2" x 5 yd -- 2" x 5 yd
Tape
-
March 18, 2024
On Monday, August 8th, 2024, the moon will pass directly in front of the sun and create a total solar eclipse. Those in the path of totality for the so-called “Great North American Eclipse” will get to witness a potentially once-in-a-lifetime event:

Hopefully, you’ve already stocked up on CE and ISO-certified 12312-2 solar eclipse glasses that block harmful infrared and ultraviolet rays when you watch the eclipse. But there’s more to the eclipse than just what’s in the sky; in fact, there are plenty of phenomena happening all around that you can’t miss out on. With the help of our very own packaging supplies, here are three solar eclipse experiments you can perform to make the most of it.
Pinhole Projection
If you have a flat object with a pinhole cut out of it, you will see a perfectly circular dot of light in the shadow of the object. That is because both the top and bottom of the sun can beam through the pinhole and form the circular dot, as seen in the top half of the image below:

However, as the moon moves in front of the sun in a solar eclipse, it forms a solar crescent that projects a crescent shape through the pinhole, as seen in the bottom half of the above image.
This effect is best captured with a surface that is thin and sturdy, such as our rigid photo mailers. Get yourself an order of our rigid mailers and punch out any pattern of pinholes you desire. You can even spell out your name with pinholes and see how your name turns into little crescents as the eclipse approaches totality.
Sharp & Fuzzy Shadows
Immediately before and after totality, the crescent-shaped sun will impart a strange effect on shadows. In short, the sides of an object that are parallel to the shape of the crescent will retain some sharpness, while the sides that are perpendicular to the crescent shape will be significantly blurrier, as the image below demonstrates:

Normal sunlight acts as an extended source of light, meaning it is a wide light source that illuminates objects with all of its sides – top, middle, and bottom. The shadows we see every day look the way they do because of this extended light source.
When the moon passes in front of the sun and forms a solar crescent, it changes the sun into a linear source of light, a narrower and more concentrated beam of light. Sides of objects in line, or parallel, to this light source appear sharper while the perpendicular sides are much blurrier.
This effect works best with objects with perfect 90° angles. Our rigid photo mailers are once again ideal for this, but most of our mailing envelopes will work just as well.
For more information on this phenomenon, check out this article from the Astronomical Society of the Pacific.
Purkinje Effect
Have you ever noticed that colors in the evening look less…colorful? This is because when our eyes adapt to darker conditions, they become more sensitive to blue colors and less sensitive to reds and greens. This natural anomaly is known as the Purkinje Effect.
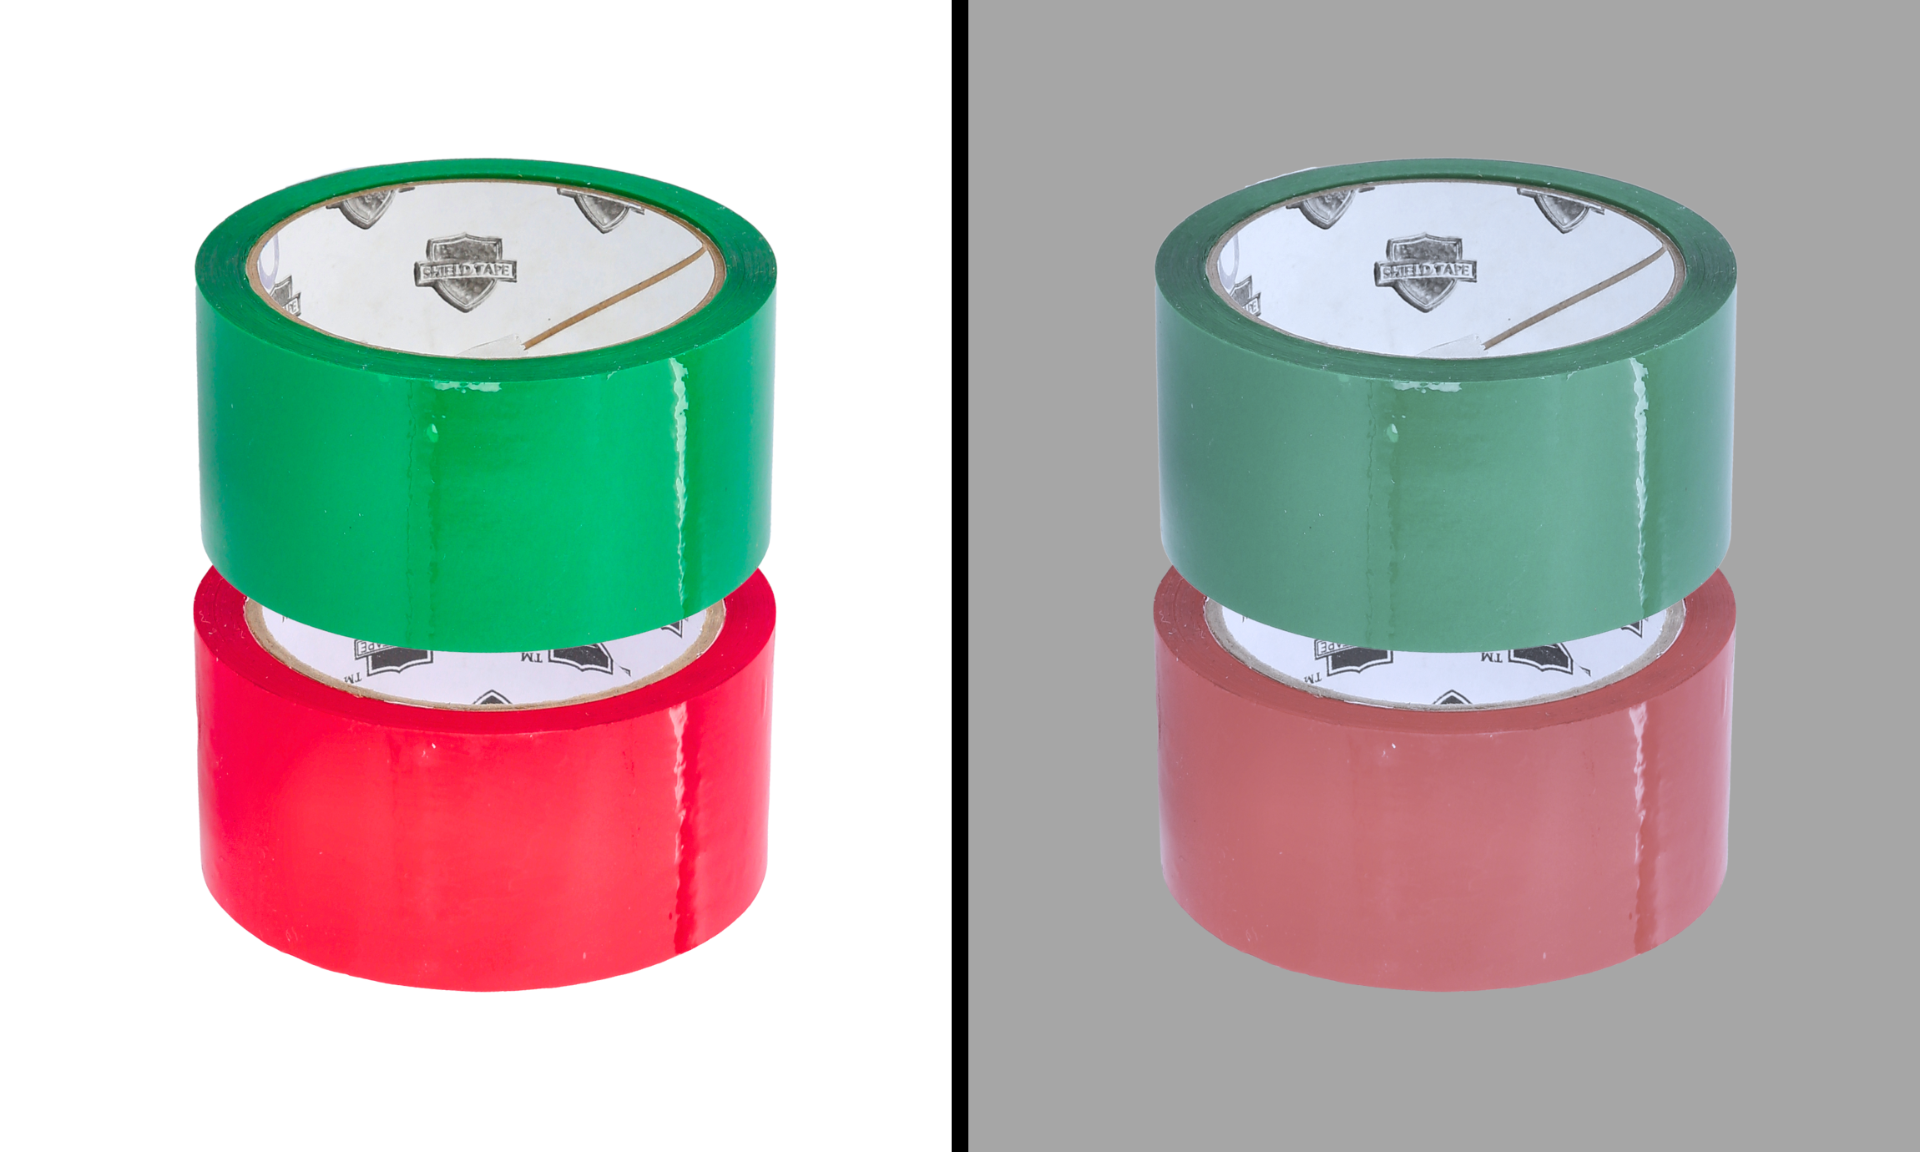
You are guaranteed to witness this effect occur during the solar eclipse. To make the most of it, stock up on some red and green tape and create a pattern or design to your heart’s content. Then, on the day of this eclipse, take your red and green creation outside and watch as the colors slowly but surely desaturate as the moon moves in front of the sun.
EclipseSuppliesByMail
Total solar eclipses are a rarity. The next time the path of totality will cross the contiguous United States won’t be until 2045, traveling from California and moving southeast into Alabama and Florida. The northeast, on the other hand, won’t see another total solar eclipse until 2099! Alongside your eclipse glasses, don’t forget to stock up on some of our rigid photo mailers and colored tape to try your hand at some solar eclipse experiments and maximize your once-in-a-lifetime experience.
At the same time, as we watch these gigantic cosmic bodies perform their celestial dance above us, we should take this moment to reflect. Despite our earthly burdens of bills and deadlines, the universe continues on its silent and graceful course. Let us, in this extraordinary moment, take a breath and embrace the feeling of being alive here and now. After all, “the cosmos,” as Carl Sagan has said, “is within us. We are made of star-tuff. We are a way for the universe to know itself.”
-
February 08, 2024

Glove Actually
It’s an anthology of sanitary love! Set during the holidays in Nitri-London, we follow a series of interconnected stories of love, sorrow, and self-discovery. The Polyethylene Minister develops feelings for a PVC dotted glove working in his household staff. A deadbeat synthetic-vinyl rockstar attempts to rekindle his stalled career with a holiday song about keeping your hands safe. A food service glove and mother of two suspects her string knit husband is unfaithful. A recently-single brown jersey glove forms a close friendship with his latex housekeeper, eventually discovering that he wants to be more than friends. And that’s only a couple of the stories in this elaborate tale of glove romance! Can the people of Nitri-London find true love by the year’s end? Just watch out for that Joni Mitchell album.
The Corrugated Box Office reports: “I saw the movie title come onto the screen, then there was darkness, then I saw the credits roll. Where am I?”
Starring Emma TPE Vinal and Directed by Richard Coated with Polyurethane
Rated R for Resistant to cuts

Cast-ablanca
It’s 1941 and Rick Supplychain is the owner of “Rick’s Depot Américain”, the most popular packaging supply store in the town of Cast-ablanca. This seedy, yet bustling establishment attracts all kinds of customers, especially refugees seeking freedom and the villains preying on them. Rick confronts a customer after hearing the song “As Tinted Wrap Goes By” only to discover it was requested by his former lover, Ilsa Laundrywrap. Ilsa and her husband VCI Laszlo are both refugees and they’ve heard that Rick has letters of transit that can help them escape. At first, Rick refuses to hand over the letters, still bitter after Ilsa suddenly abandoned him in High Perform-France a year ago. However, when Ilsa explains that Laszlo went missing around that time and that she regrets leaving without saying why, Rick’s cold heart softens. Will Rick Supplychain be able to get Ilsa and Laszlo to freedom before the villains of Cast-blanca get to them? No matter what, you’d better round up the usual stretch wraps because this is the beginning of beautiful free shipping.
Entertainment Biweekly raves: “Pretentious and trite, an exercise in self-aggrandizement, but the theater had popcorn with the cheese powder so I ended up enjoying the experience.”
Starring Handwrap Bogart and Directed by Machinewrap Curtiz
Rated NC-17 for No Cast film under 17 gauge sold

Beauty and the Beard Covers
Bouffant Cap is a young woman in a small village who dreams of something greater. Despite advances from the local hunk and hunter Hard Hat-ston, Bouffant finds refuge in the safety manuals at the library and her eccentric inventor father, Mob Cap. When her father goes missing one night, Bouffant journeys to the remote and cursed Disposable Castle to find him imprisoned by the claws of the Beard Cover Beast. Bouffant offers to take her father’s place as the Beast’s prisoner, which the Beast accepts. Over the next few weeks, slowly yet surely, Bouffant and the Beard Cover Beast develop a rapport with each other that soon turns into love. However, Hard Hat-ston eventually discovers their love and, enraged with jealousy, stirs up an angry mob to storm the castle. Can the Disposable Castle fend off the OSHA-violating mob of villagers? Will Bouffant and the Beard Cover Beast’s love persevere? This Valentine’s Day, be our guest and put our safety supplies to the test!
Variety Fair declares: “I am a Nigerian prince and if you could kindly provide me your bank account information, I will transfer $20 million to your checking or savings account.”
Starring Jerry Oversleevesbach and Directed by Sydney Polypropylene
Rated G for Great safety supplies only at PackagingSuppliesByMail
-
January 26, 2024
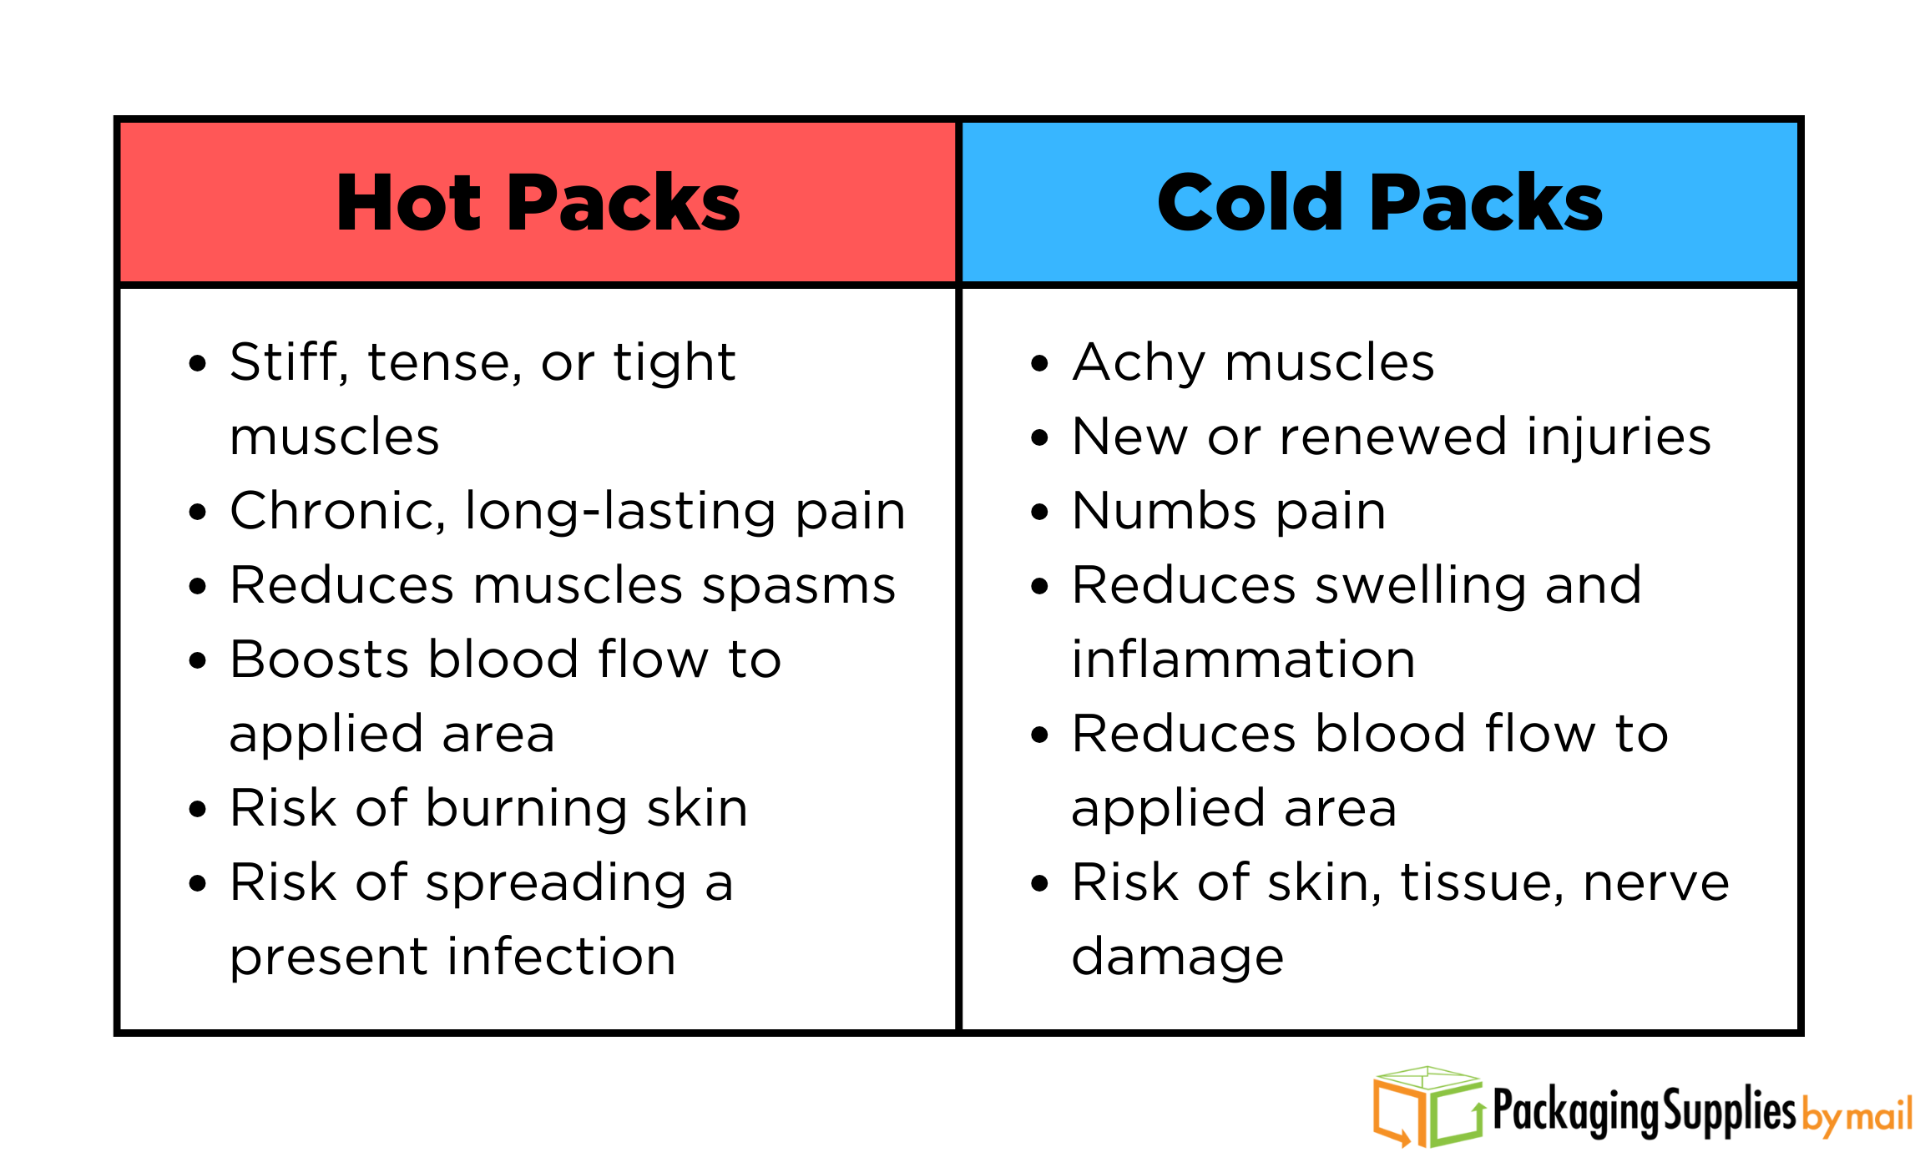
When you’re in pain, you want relief and you want it now. Thankfully, we have devised ways to use temperature to provide fast pain relief. In fact, from saunas to ice baths, we have been using heat and cold therapies for centuries. These days, when we’re looking for quick and convenient pain relief, we reach for our hot packs and cold packs.
Hot and cold packs are either pressure-activated or kept in heated/chilled environments until they are needed. These tools of thermotherapy are a staple at home, schools, and work, but they are also not without their risks. This article will cover the recommended uses for hot packs and cold packs, as well as some things to watch out for.
Hot Packs
Benefits
Heat is primarily used to release tension and encourage blood flow. Therefore, hot packs are typically applied to muscles that are either stiff and tense or muscles enduring spasms. The constant heat loosens stiff muscles and increases the flow of blood in the specific area it is held to, reducing the intensity and frequency of spasms over time. Hot packs are also great for muscle pain that is chronic and long-lasting.
Risks
The most common risk associated with heat therapy is burning. A heat pack that is running too hot or held in one spot for too long can impart burns on the area of the skin it is in contact with. This can exacerbate the current problem and/or introduce new ones. Speaking of which, those dealing with an infection need to be careful when using a hot pack, as it can encourage the infection to spread more rapidly throughout the body.
Medical professionals recommend using a hot pack for no longer than 20 minutes at a time and avoiding using one within the first 48 hours of a minor injury.
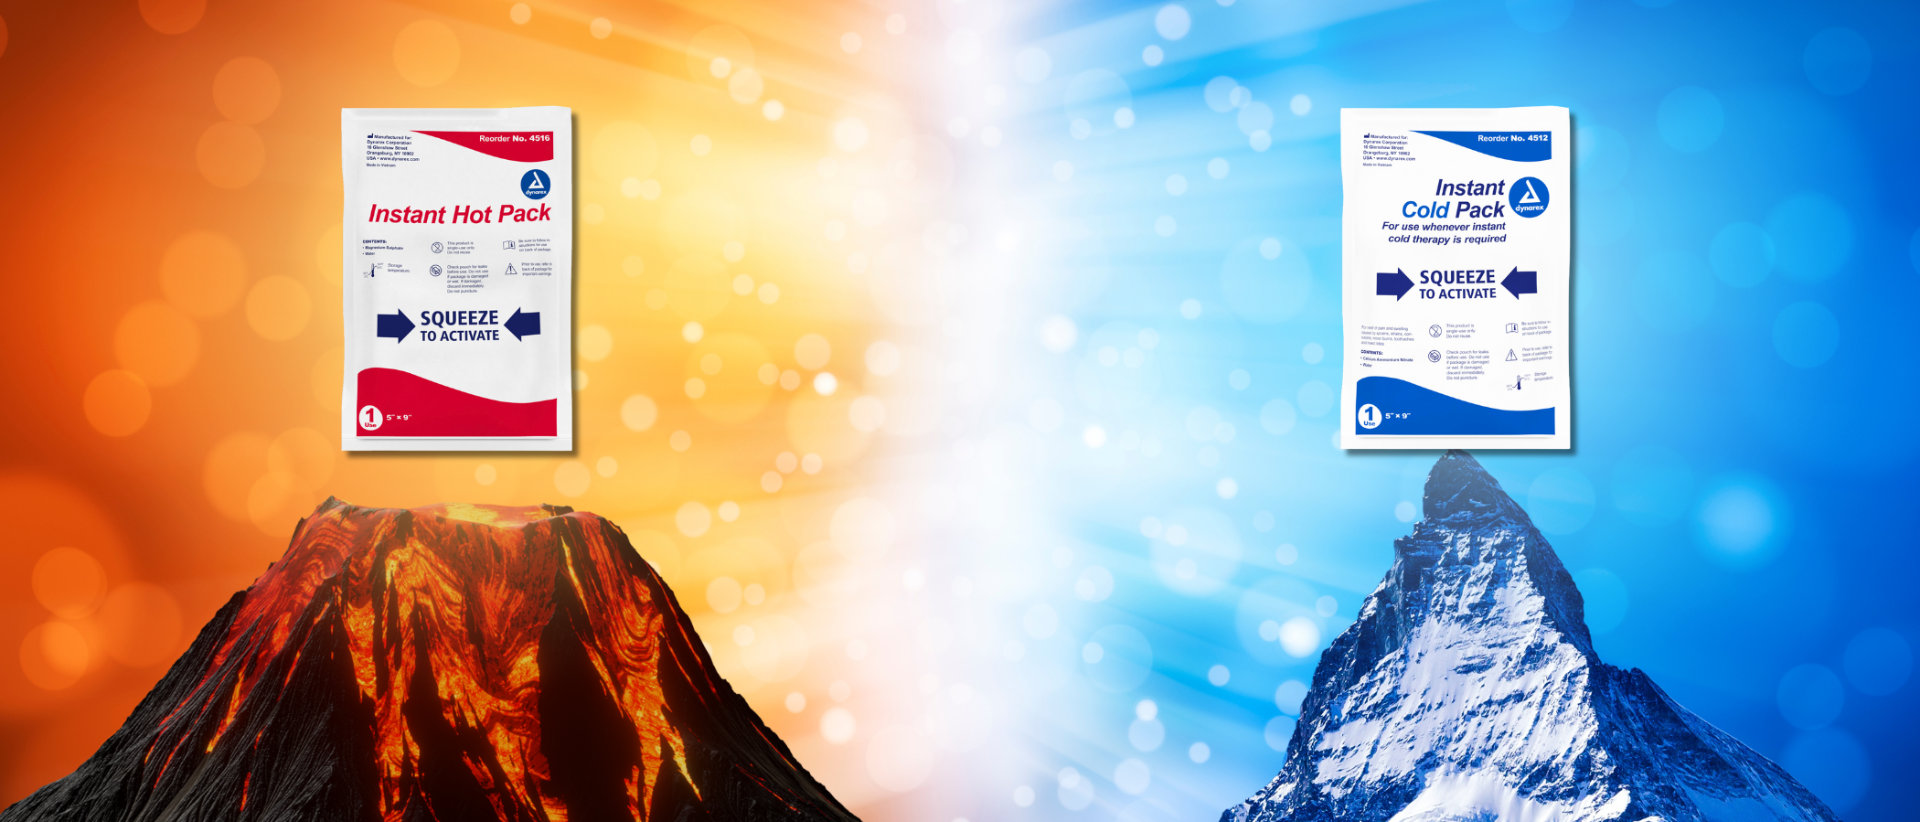
Cold Packs
Benefits
Cold is primarily used to reduce swelling, inflammation, and blood flow. Unlike hot packs, cold packs are recommended for new or renewed injuries. The constant cold restricts blood flow and numbs the area of the skin it contacts, helping to ease the pain and minimize any bleeding. Cold packs are also great for relieving sore and achy muscles.
Risks
Improper use of cold packs can result in skin, tissue, and nerve damage. Similar to the risks associated with winter, cold packs that are kept in place for too long will prevent proper blood flow to various parts of the body. Without the necessary amount of blood and body heat, the area that is in contact with the cold pack will lose strength and begin sustaining damage inside and out.
Medical professionals recommend using a cold pack for no longer than 20 minutes at a time.
Running Hot and Cold
Heat and cold are important forces in our lives. They not only dictate what we wear and how we live, but they can also provide much-needed pain relief in critical situations. Whether you need to loosen muscles and increase blood flow, or reduce swelling and decrease blood flow, hot and cold packs are great tools for taking the hurt out of being hurt. As long we stay aware of the risks and restrict usage to 20-minute intervals, thermotherapy can serve us well.
If you’d like to learn more about hot packs and cold packs, the Cleveland Clinic has a great article on thermotherapy, covering its use for specific conditions like arthritis and tendinitis.
While you’re here, be sure to check out our wide selection of medical supplies, including hot and cold therapy products. Orders of medical supplies over $150 come with free shipping, so you can provide some quick and convenient pain relief today!
For further reading on our medical supplies, we have an article on first aid kits, detailing what goes in them and how to use them.
Hot Packs
Cold Packs
Stiff, tense, or tight muscles
Chronic, long-lasting pain
Reduces muscle spasms
Boosts blood flow to applied area
Risk of burning skin
Risk of spreading a present infection
Achy muscles
New or renewed injuries
Numbs pain
Reduces swelling and inflammation
Reduced blood flow to applied area
Risk of skin, tissue, nerve damage
-
April 11, 2024
Downtime: the archnemesis of uptime. When your packaging and shipping department experiences downtime, it can bring your entire operations to a screeching halt. This, in turn, results in prolonged deliveries, customer dissatisfaction, and a significant loss to your bottom line.
Packaging downtime is an unfortunate inevitability for any company. However, there are several ways you can minimize downtime so your business can perform at the optimum level. In this highly functional article, we will cover four ways you can keep packaging downtime at bay.
Practice Preventive Maintenance
A common phrase you’ll hear in health care is “prevention is better than cure”. The same principle applies to your company’s packaging operations: preventing downtime is a lot easier—and cheaper—than resolving it.
Like with any machinery, your packaging equipment can only run continuously for so long before they start to develop problems. And if you’ve got older equipment, they’ll develop their problems sooner than later. To combat this, schedule inspections on a weekly to monthly basis to examine the condition of your equipment.
Make sure you also set up comprehensive maintenance checklists so that each and every component of your equipment is verified to be in top working order. At the same time, make sure your maintenance team is given enough time to thoroughly check over the machines and provide detailed records of their maintenance checks.
Measure Optimum Output During Uptime
You may learn more from your failures than your successes, but your successes still provide some worthy insight into how your operations should function. When your packaging and shipping operations are running smoothly, develop some key performance indicators (KPIs) and take measurements on how things are performing.
When developing your KPIs, ask yourself the essential questions: how many packages or pallets are shipped out an hour, or a day? How long does it take for an item to go through the entire packaging department? Are there any areas or systems that can be improved to increase your output?
With a solid set of KPIs and careful measurement of your operations, you can determine what optimal output looks like so that when downtime strikes, you’ll notice it immediately and then determine the source of the downtime more easily.
Have Spare Parts Stocked Up
Even the best-made plans can go awry. Machine parts, especially those in constant motion, will wear down over time. These old and faulty parts will impair the machine’s performance, or worse, break it. When your parts are well past their prime, they need to be replaced.
A stockpile of spare parts can be a lifesaver in moments of downtime. Thankfully, most manufacturers of industrial equipment are more than willing to sell replacement parts for their machines. Just make sure you have the manual or reference guide with parts numbers at the ready so that you can request the right parts.
Plan Your Budget for Upgrades
Nothing lasts forever, especially not industrial machinery. When your packaging equipment reaches the end of its operational lifespan, it needs to be replaced. However, industrial equipment can be incredibly expensive and perhaps unfeasible if you cannot budget for it.
If maintenance discovers that a piece of equipment is on its way out during a routine maintenance inspection, or the equipment is getting close to the manufacturer’s recommended lifespan, plan early for expensive upgrades. At the beginning of the fiscal year, set aside a percentage of the yearly budget to go exclusively to upgrades and repairs.
A new piece of industrial equipment can be costly, but a critical failure will be costlier.
Cut Down Your Downtime
Life comes with three guarantees: death, taxes, and downtime. Even the world’s most successful businesses, like Amazon, Apple, and General Motors, will encounter packaging downtime that can stop operations in their tracks. The name of the game isn’t making sure you never have downtime—it’s keeping downtime to an absolute minimum.
Preventative maintenance and spare parts are crucial for addressing downtime in the heat of the moment. At the same time, taking measurements during uptime and planning for upgrades can go a long way toward staving off future downtime as much as possible. Your ability to handle downtime all comes down to how prepared you are for it.
For further reading on managing your packaging operations, be sure to check out our article on why you may need to improve your operations with a stretch wrap machine.
-
April 09, 2024
It’s easy to underestimate the importance of a good morning routine. Many people will give themselves just enough time to wake up, slug back a cup of coffee, dress for the day, and hit the road. And while this tight and bare-bones routine may work for some, it won’t work for everyone.
A good morning routine that works for you will not only boost your energy and productivity for the day, but will also give you an opportunity to take care of things you may not otherwise have the time for. On top of this, it just feels good. Whether you’re an early bird or a night owl, here are some basic steps you can take to ensure that you’re primed and ready for your day.
Prepare the Night Before
Did you know that a good morning routine starts the night before? After all, your nighttime habits don’t just impact your morning—they affect your whole day. You should establish a healthy end-of-day routine to calm your mind and ready yourself for a good night’s sleep.
For starters, avoid eating within 2-3 hours before going to bed. This will give your body enough time to digest your food, thereby calming your stomach so it doesn’t bother you throughout the night. You definitely need to watch out for sugar, caffeine, and alcohol, as these can be very disruptive to your sleep.
Similarly, you should avoid using your phone or watching TV 2-3 hours before bedtime. Not only do these devices keep your mind stimulated with an unending stream of engaging content, but the blue light they emit inhibits the body’s ability to produce sleep-inducing melatonin.
Lastly, develop some habits to let your brain know that it’s time to go to sleep. Whether it’s putting on a comfortable set of pajamas, brewing a calming herbal tea, or spending an hour reading your favorite book, establishing a healthy pattern for ending your day reminds your brain that it’s time to go to bed.
Get a Good Night of Sleep
A good night’s sleep is essential to your health and well-being. For one, good sleep improves your mood, focus, and productivity going into the day.
But more importantly, sleep is critical for your mental and physical health. A good night of sleep keeps your heart healthy, your immune system strong, and your metabolism in excellent condition. Furthermore, good sleep helps in managing depression and anxiety.
Make sure your bedroom is conducive to good sleep. Keep the room dark and at a regulated temperature, around 65°F (18.3°C) for adults. Also, you ought to keep your phone, laptop, and other similar electronics in another room. If you use your phone as your alarm, you may want to consider purchasing a standalone alarm clock.
Avoid the Snooze Button
You’ve likely heard this advice a thousand times over, but you’d be surprised how risky hitting snooze can be. You may be in a state of deep sleep right when your alarm wakes you. Although you may intend to get an extra five minutes by hitting snooze, your body is determined to get more and you may end up sleeping a lot longer than you intended.
But even if you avoid oversleeping, staying in bed longer than necessary can induce grogginess and fatigue that you’ll have to carry with you through the whole day. On top of this, you may be disturbing your body’s natural sleep cycle and setting yourself up for sleep deprivation later that night.
Drink Some Water
There’s nothing wrong with a hot cup of coffee or tea to start your day. In fact, many will tell you that the warm beverage and spot of caffeine helps to wake you up and stimulate your mind. However, you should consider chasing that hot cup with a refreshing glass of water.
Firstly, a glass of water helps to replenish your body’s fluids. Throughout the night, your natural bodily functions will slowly but surely dehydrate you. This dehydration is compounded by nighttime visits to the bathroom or a round of drinks the night before. Restoring your bodily fluids keeps the fatigue that dehydration induces at bay.
Additionally, water in the morning helps to stimulate your mind and digestive system. For more information on the health benefits of a glass of water in the morning, check out this article from Real Simple.
Breakfast or Not?
Is it the most important meal of the day? This is actually quite the subject of debate, with supporters on either side making their case.
Those in favor of breakfast in the morning proclaim that it jumpstarts the body’s metabolism, literally “breaking the fast”, and giving the body the vitamins and nutrients it needs to have that energy boost early in the day. Furthermore, those who regularly start their day with breakfast are reported to be at a lower risk of heart disease, high blood pressure, and stroke.
However, an increasing percentage of adults are choosing to skip breakfast. These people often participate in intermittent fasting, where they restrict themselves to eating during a designated period of the day, then fasting for the majority of it. Intermittent fasting reportedly boosts fat burning, repairs damaged cells, fights inflammation, and help manage symptoms of type 2 diabetes.
In the end, there’s no clear-cut answer. If you think eating breakfast helps start your day, stick with it. If not, skip it. If you want, you can try starting some days with breakfast and some days without and see what works for you.
Get Moving
When you’re fresh out of bed in the morning, you may not enjoy the thought of moving around all that much, let alone a full-on workout. But a session of light exercise can do wonders for waking you up and getting you ready for the day.
Exercising early in the day increases your body’s blood flow and quickly delivers oxygen to the brain, which promptly kickstarts your metabolism and cardiovascular system and fights off the morning grog. Furthermore, morning exercise encourages a healthy and active lifestyle.
If you can afford the time, a morning jog or yoga session is a great way to start the day. However, if you’re crunched for time, try out this 10-minute exercise routine from HealthXchange.
Meditate
Mornings seem to be focused on the “get up and go”, but our mornings can also be a moment to briefly stop and breathe. Practicing stillness and mindfulness at the start of the day can go on to lower your stress, focus your thoughts, and manage your emotions.
Your morning meditation can be as simple as putting on some calming music and going over some positive affirmations (I am enough, I am grateful for the life I have, I have the power to achieve my dreams). There are also countless guided meditations on YouTube and mindfulness apps like Calm and Headspace that you can try.
At the same time, you may want to avoid the news and social media in the early morning. These can be sources of carefully curated negativity that can greatly impact your mental state going into your day.
Plan Your Day
“Plan your work and work your plan”, as they say. Planning for the day ahead of you gives you a sense of purpose and a set of tasks to focus on, whether you’re at work or you have the day off. Is there an important project you need to chip away at? Is there something you’ve been putting off? Is there an idea you’ve had for a while? This is the time to decide what your day will look like.
Making a to-do list can help to regiment your day. With this list, you can assign certain parts of the day to certain tasks, helping you both stay on schedule and give you a concrete sense of accomplishment. It can also deal with more frivolous decision-making, such as when you’re taking your coffee break or what you’re going to have for lunch.
“Eat the Frog”
No, we’re not asking you to literally eat frogs, unless you’re a professional connoisseur of frog legs. This phrase comes from a quote by the author Mark Twain: “If it's your job to eat a frog, it's best to do it first thing in the morning. And if it's your job to eat two frogs, it's best to eat the biggest one first.”
Frogs, in this instance, are tasks and responsibilities. In essence, Twain declares that it’s best to do your hardest task first thing in the morning. That way, the most difficult part of your day will quickly be behind you. After waking your mind and body up with your morning routine, go ahead and tackle that burdensome report or financial statement and get it out of the way. You’ll thank yourself in the afternoon.
Rise and Shine
Mornings are something many of us don’t give much thought to—it’s simply a transitional period between night and day. However, our mornings are incredibly important. Put simply, a good or bad morning can make the difference between a good or bad day. And a strong morning routine helps us make the most of it.
We’re not all going to have the same morning routine. After all, we’re all unique individuals, mentally and physically. But that’s also the beauty of it: we can custom-tailor our mornings to meet our specific needs. Whether or not you eat breakfast, or you have a particular time of day that your body is most accustomed to waking up at, you can create a morning routine that works just for you.
For further reading on establishing a healthy lifestyle, check out our article about staying active at work.
-
April 05, 2024
Packaging can be quite stressful, but perhaps not in the way you’re thinking. While you may be dealing with the stresses of deadlines, customer demands, and daily operations, your packing tape will encounter a different kind of stress: adhesive stress.
Adhesive stress refers to how the adhesive bond is pulled, stretched, and otherwise deformed when acted upon by external forces. In this sticky article, we will go over the five types of stress your tape will face throughout packaging and shipping.
Tensile Stress
Tensile stress occurs when the adhesive bond is elongated or pulled apart by external forces moving away from each other. The direction of the pulling is perpendicular to the bond and the stress is distributed evenly across the surface.
Compression Stress
This is the inverse of tensile stress, where the bond is compressed or smushed by external forces moving toward each other. Like tensile, the direction of the stress is perpendicular to the bond and is distributed evenly.
Shear Stress
Unlike the previous two, shear stress involves external forces moving across each other, parallel to the bond surface. This stress stretches the adhesive bond laterally. Despite the change in direction, the stress is still evenly distributed across the bond surface.
Cleavage Stress
Cleavage stress involves external forces pulling apart one side of the bond while the other side experiences little to no stress. While the previous three stresses are evenly distributed across the entire area of the bond, this stress is uneven and concentrated on a single side.
Peel Stress
Peel stress is similar to cleavage, as the external forces pull apart one side and leave the other side alone, putting uneven stress on the bond. In this instance, however, at least one of the surfaces is flexible, such as a tape backing. This results in greater stress in the area getting pulled apart, making it a more extreme form of cleavage stress.
Stress Management
Adhesive stress is the challenge all tapes must face. Whether it’s sealing boxes, hanging decorations, or making repairs, tapes must be able to stand up to the forces trying to pull them apart.
At the same time, some specialty tapes, like masking and painter’s tape, are specifically formulated to easily give way to peel and shear stresses so they can be removed quickly and cleanly. So the next time you need to use some tape, consider what you’re using it for and what kind of adhesive strength you need.
While you’re here, be sure to check out our selection of tape products, available in a wide variety of tensile and shear strengths. All our tapes come with free shipping, so you can tackle the challenges of adhesive stress today.
For more information on adhesives, take a look at our article comparing pressure-sensitive and water-activated tapes.
-
April 02, 2024
Whether you’re a construction worker on the jobsite, or a DIY-er looking to improve their home, you want to keep the areas you’re not working on safe from the areas you are working on. The last thing you need when you’re in the middle of a project is your floors getting stained or damaged. That, and a devastating apocalyptic event.
Luckily for you, surface protection tape is available to answer your safeguarding needs. This adhesive film is easily unrolled onto your floors and keeps them safe from debris, stains, scrapes, and other kinds of common damage. However, some important steps need to be taken to ensure that your hard surface or carpet protection tape stays in place and works properly.
Clean the Surface
Before you apply an inch of tape, you need to clean the surfaces you intend to protect. For hard surfaces, dust and sweep to get rid of loose specks and particles. Then, mop your hard surfaces and let them dry before applying the tape.
For carpets, thoroughly vacuum every inch of the surface you’ll be covering with protection tape. If you think you need to, steam clean or shampoo your carpeting and wait until it’s completely dried before placing the tape down. Covering still-moist carpets with this tape can run the risk of developing mildew.
Wear Shoe Covers
Rubber soles and high-traction footwear can pull on surface protection tape and dislodge it from where it was placed. To avoid this, put shoe covers over your footwear.
These plastic coverings have less grip than your shoes, ensuring that your surface protection tape stays in place. Furthermore, shoe covers keep you from tracking dust, dirt, and other contaminants into your work area.
Apply It Carefully
Surface protection tape works in the same way any roll of pressure-sensitive tape does: unwind it and stick it to your surface. However, this kind of tape can be 2 feet wide or more, making it a cumbersome object to deal with.
We recommend two people for this job: one to hold the roll of tape steady and the other to unwind it and press it onto the surface. Make sure you’re both wearing shoe covers and avoid walking on the freshly applied tape as much as possible to give it a chance to effectively bond with the surface. Let the tape set for 48 hours before working and walking on it.
If you’re by yourself, you may want to get yourself a surface protection film applicator, which essentially works like an oversized paint roller.
Can’t Tape It? Wrap It
Surface protection tape isn’t just for floors. In fact, this tape can be used on a wide variety of surfaces, including tables, countertops, large appliances, and more. However, when it comes to small and/or oddly shaped items, surface protection tape may not be up to the task.
In these instances, a roll of hand stretch wrap or mini bundling wrap will do the job. All you have to do is tightly wrap these objects all over in three or four layers of stretch film and they’ll be adequately protected from debris, moisture, and other contaminants. The plastic film clings to itself, so there’s no need for tapes, adhesives, or any other binder to keep it in place.
Don’t Leave It for Long
The acrylic adhesive used in hard surface and carpet protection tape is formulated to not leave an adhesive residue behind upon its removal. However, this only works within 45 days of applying the tape. After that, the bond will have solidified enough to impart a residue on your surface.
Make sure you keep track of when you applied your tape and how long it’s been there to keep your carpeting and hard surfaces free from unsightly residue.
No Scratching the Surface
Surface protection tape is essential for painting projects, renovations, construction, and more. Its light but firm adhesive held by its puncture-resistant plastic backing safeguards floors, carpeting, and other surfaces from unwelcome stains and scrapes. As long as you clean your surfaces, apply the tape carefully, wear shoe covers, and remove it within 45 days, you can keep unnecessary surface restoration off your to-do list.
While you’re here, be sure to check out our selection of surface protection tapes, available in carpet and hard surface varieties. All these products come with free shipping, so you can get to protecting your surfaces right away.
For further reading on protective tapes, take a look at our article comparing masking tape to painter’s tape.
-
March 25, 2024
Visibility is essential in high-risk, high-traffic areas. Whether you find yourself working in a warehouse bustling with tow motors and scissor lifts, or repairing a section of highway and standing a few feet away from 60 mph traffic, staying highly visible is not just professional—it could very well save your life. Thankfully, there’s an easy solution to our hi-vis needs: safety vests.
Safety vests are ubiquitous and universal. From crossing guards, to construction workers, and even to emergency responders, safety vests keep essential workers in sight and in mind. But not all safety vests are the same. Safety vests are differentiated by type and class, following standards set by national organizations. In this highly visible article, we will go over the different kinds of safety vests, how to maintain them, and when to replace them.
What are the Different Types of Safety Vests?
Safety vests come in three types, differentiated by who wears them and where they work:
Type O (Off-Road): these safety vests are worn by workers who are not working in roadway environments. However, these workers may still be in high-traffic areas bustling with forklifts, industrial equipment, and other large moving objects that can be a hazard.
Type R (Roadway): these safety vests are for those who work in roadway environments and in close proximity to high-speed traffic.
Type P (Public Safety): these safety vests are specifically worn by fire, police, and EMS personnel working on roadways or other hazardous environments. While similar to type R, type P vests typically have more stringent specifications for background and reflective materials.
What are the Different Safety Vest Classes?
The different classes of safety vests are determined by the American National Standards Institute, or ANSI, which is a private organization that sets voluntary standards for safety and quality. These classes are differentiated by the amount of background material, the amount of reflective material, and color.
Non-Certified Safety VestNot all safety vests are certified by ANSI. In fact, there are plenty of safety vests available for purchase that are not in compliance with ANSI’s standards. But this is no accident, as they are often reserved for visitors and contractors. Non-ANSI safety vests are also favored by long-distance runners who jog in conditions with low light levels, such as early in the morning or late at night.
As these vests are not in compliance with ANSI, there are no hard rules determining the measurements for background and reflective materials. Generally, these vests will feature a band of reflective material going around the middle and/or above each shoulder. The background material can be of any size and color.
Class I Safety VestClass I safety vests are exclusively type O vests, meaning that these vests are not for roadway use. However, these vests are worn by those who work in environments with large, moving equipment/machines, such as forklifts and floor cranes, where high visibility is still necessary for safe operations. Class I vests are much like non-certified vests, but with clearly defined regulations for their materials.
Class I vests must have at least 217 square inches of background material in bright yellow or bright orange. These vests must have a minimum of 155 square inches of 1-inch width reflective material that goes around the middle and above each shoulder. Class I safety vests are not permitted for traffic zones exceeding 25 miles per hour.
Class II Safety VestClass II safety vests encompass both type R and type P vests, indicating that these vests are intended for use on roadways with moderate traffic speeds. These vests feature more background and reflective materials than class I vests, especially for type P vests, given the increased need for visibility in areas with higher traffic levels.
Class II vests require a minimum of 775 square inches of background material in hi-vis yellow or orange. The vests need 201 square inches of reflective materials at a 2” width, or 1” if it’s a split-trim design. The reflective materials must go around the middle once or twice and above each shoulder. Class II vests are not permitted for traffic zones exceeding 49 miles per hour.
Class III Safety VestClass III safety vests are the most intricate kinds of hi-vis vests. Like class II, class III vests include both type R and type P vests. However, these vests are designed for roadways with traffic speeds at 50 miles per hour or more. Because of this, these vests have the highest amount of high-visibility materials of all classes. On top of this, these vests are only kind to have sleeves.
Class III vests must have at least 1,240 square inches of background material in bright yellow or orange. These vests need a minimum of 310 square inches of reflective material in a 2” width, or 1” if it’s a split-trim design. The reflective material must go around the middle once or twice, above each shoulder, and around each sleeve. Class III safety vests are acceptable for any kind of traffic zone at any speed.
Class
Image
Types
Background Amount
Background Colors
Reflective Amount
Reflective Width
Sleeves
Traffic Zone
Non-ANSI
N/A
N/A
Any
N/A
N/A
Maybe
N/A
Class I
O
217 sq. in.
Yellow, Orange
155 sq. in.
1"
No
<25 mph
Class II
R, P
775 sq. in.
Yellow, Orange
201 sq. in.
2" or 1" for split trim
No
25 - 49 mph
Class III
R, P
1240 sq. in.
Yellow, Orange
310 sq. in.
2" or 1" for split trim
Yes
50+ mph
How Do I Care for My Safety Vest?
Buying and wearing your safety vest isn’t the end of the story. You also need to properly maintain your safety vest to ensure that it’s working for you. For instance, if your safety vest is covered in mud, its high-visibility properties are significantly reduced, leaving you in danger of being hit by someone who can’t see you.
Most safety vests can be machine-washed. Simply add it to a load with similar colors, select a delicate cycle, and run it with cold water. Mild detergents are fine to use, but a high-strength detergent may rapidly fade the colors. Then, place it in your dryer and run it on low heat. Routine washes will slowly fade the colors over time, so be on the lookout for this.
Due to the materials used to make safety vests, you should avoid ironing or dry cleaning your vest or you may compromise its material integrity.
When Should I Replace My Safety Vest?
Safety vests don’t last forever. The average lifespan of a standard safety vest that is used daily is around 6 months. Premium quality vests or vests worn infrequently can last up to three years depending on their condition and use.
ANSI has color inspection cards to determine the efficacy of safety vests. If your vest does not match the colors on the inspection card, it’s time to replace it. Furthermore, if your vest is damaged or fails to close properly, it needs to be replaced.
Final Thoughts
Learning about your safety vests is no waste of time. In fact, wearing the right safety vest in the right environment can keep you from serious injury or even death. And while ANSI isn’t an official government agency, their standards for personal protective equipment (PPE), safe operations, and more are near-universally accepted by American industries.
Whether you’re a crossing guard, a construction worker, or a fireman, visibility in hazardous settings is essential for your safety and for the safety of others. While class III vests are acceptable for any situation at any traffic speed, they may be overkill if you’re just dealing with golf carts and hand trucks. Take the time to learn what kind of an environment you’re working in to make sure you have the appropriate vest for it.
And while you’re here, check out our selection of safety vests, available in ANSI-certified class II and class III. Our safety supplies come with free shipping, so you can guarantee that you’ll be highly visible in hazardous conditions in no time.
For more information on our safety supplies, take a look at our article going over hard hat classes and best practices.
-
March 18, 2024
Our Medical Tape & Bandage Products keep wounds protected and hold dressings in place.
What are Adhesive Bandages?
Adhesive Bandages are adhesive.
Our Adhesive Bandages
Product
Image
Sizes
Features
1" x 3" -- 1-3/4" x 2"
Bandage
3/8" x 1-13/16" -- 1/2" x 2-3/4"
Bandage
1" x 3"
Bandage
1" x 3" -- 3" x 2-7/8"
Bandage
7/8" x 3" -- 1-3/4" x 3"
Bandage
3/4" x 3" -- 2" x 4"
Bandage
7/8" -- 1" x 3"
Bandage
3/4" x 3" -- 1-3/4" x 3"
Bandage
3/4" x 3" -- 1" x 3"
Bandage
3/4" x 3" -- 1" x 3"
Bandage
What are Medical Tapes?
Medical Tapes are medical.
Our Medical Tapes
Product
Image
Size
Features
1" x 10 yd
Tape
1" x 5 yd
Tape
1/2" x 10 yd -- 1" x 10 yd
Tape
3/4" x 30 yd -- 1" x 30 yd
Tape
1/2" x 5 yd -- 2" x 5 yd
Tape
-
March 18, 2024
On Monday, August 8th, 2024, the moon will pass directly in front of the sun and create a total solar eclipse. Those in the path of totality for the so-called “Great North American Eclipse” will get to witness a potentially once-in-a-lifetime event:
Hopefully, you’ve already stocked up on CE and ISO-certified 12312-2 solar eclipse glasses that block harmful infrared and ultraviolet rays when you watch the eclipse. But there’s more to the eclipse than just what’s in the sky; in fact, there are plenty of phenomena happening all around that you can’t miss out on. With the help of our very own packaging supplies, here are three solar eclipse experiments you can perform to make the most of it.
Pinhole Projection
If you have a flat object with a pinhole cut out of it, you will see a perfectly circular dot of light in the shadow of the object. That is because both the top and bottom of the sun can beam through the pinhole and form the circular dot, as seen in the top half of the image below:
However, as the moon moves in front of the sun in a solar eclipse, it forms a solar crescent that projects a crescent shape through the pinhole, as seen in the bottom half of the above image.
This effect is best captured with a surface that is thin and sturdy, such as our rigid photo mailers. Get yourself an order of our rigid mailers and punch out any pattern of pinholes you desire. You can even spell out your name with pinholes and see how your name turns into little crescents as the eclipse approaches totality.
Sharp & Fuzzy Shadows
Immediately before and after totality, the crescent-shaped sun will impart a strange effect on shadows. In short, the sides of an object that are parallel to the shape of the crescent will retain some sharpness, while the sides that are perpendicular to the crescent shape will be significantly blurrier, as the image below demonstrates:
Normal sunlight acts as an extended source of light, meaning it is a wide light source that illuminates objects with all of its sides – top, middle, and bottom. The shadows we see every day look the way they do because of this extended light source.
When the moon passes in front of the sun and forms a solar crescent, it changes the sun into a linear source of light, a narrower and more concentrated beam of light. Sides of objects in line, or parallel, to this light source appear sharper while the perpendicular sides are much blurrier.
This effect works best with objects with perfect 90° angles. Our rigid photo mailers are once again ideal for this, but most of our mailing envelopes will work just as well.
For more information on this phenomenon, check out this article from the Astronomical Society of the Pacific.
Purkinje Effect
Have you ever noticed that colors in the evening look less…colorful? This is because when our eyes adapt to darker conditions, they become more sensitive to blue colors and less sensitive to reds and greens. This natural anomaly is known as the Purkinje Effect.
You are guaranteed to witness this effect occur during the solar eclipse. To make the most of it, stock up on some red and green tape and create a pattern or design to your heart’s content. Then, on the day of this eclipse, take your red and green creation outside and watch as the colors slowly but surely desaturate as the moon moves in front of the sun.
EclipseSuppliesByMail
Total solar eclipses are a rarity. The next time the path of totality will cross the contiguous United States won’t be until 2045, traveling from California and moving southeast into Alabama and Florida. The northeast, on the other hand, won’t see another total solar eclipse until 2099! Alongside your eclipse glasses, don’t forget to stock up on some of our rigid photo mailers and colored tape to try your hand at some solar eclipse experiments and maximize your once-in-a-lifetime experience.
At the same time, as we watch these gigantic cosmic bodies perform their celestial dance above us, we should take this moment to reflect. Despite our earthly burdens of bills and deadlines, the universe continues on its silent and graceful course. Let us, in this extraordinary moment, take a breath and embrace the feeling of being alive here and now. After all, “the cosmos,” as Carl Sagan has said, “is within us. We are made of star-tuff. We are a way for the universe to know itself.”
-
February 08, 2024
Glove Actually
It’s an anthology of sanitary love! Set during the holidays in Nitri-London, we follow a series of interconnected stories of love, sorrow, and self-discovery. The Polyethylene Minister develops feelings for a PVC dotted glove working in his household staff. A deadbeat synthetic-vinyl rockstar attempts to rekindle his stalled career with a holiday song about keeping your hands safe. A food service glove and mother of two suspects her string knit husband is unfaithful. A recently-single brown jersey glove forms a close friendship with his latex housekeeper, eventually discovering that he wants to be more than friends. And that’s only a couple of the stories in this elaborate tale of glove romance! Can the people of Nitri-London find true love by the year’s end? Just watch out for that Joni Mitchell album.
The Corrugated Box Office reports: “I saw the movie title come onto the screen, then there was darkness, then I saw the credits roll. Where am I?”
Starring Emma TPE Vinal and Directed by Richard Coated with Polyurethane
Rated R for Resistant to cuts
Cast-ablanca
It’s 1941 and Rick Supplychain is the owner of “Rick’s Depot Américain”, the most popular packaging supply store in the town of Cast-ablanca. This seedy, yet bustling establishment attracts all kinds of customers, especially refugees seeking freedom and the villains preying on them. Rick confronts a customer after hearing the song “As Tinted Wrap Goes By” only to discover it was requested by his former lover, Ilsa Laundrywrap. Ilsa and her husband VCI Laszlo are both refugees and they’ve heard that Rick has letters of transit that can help them escape. At first, Rick refuses to hand over the letters, still bitter after Ilsa suddenly abandoned him in High Perform-France a year ago. However, when Ilsa explains that Laszlo went missing around that time and that she regrets leaving without saying why, Rick’s cold heart softens. Will Rick Supplychain be able to get Ilsa and Laszlo to freedom before the villains of Cast-blanca get to them? No matter what, you’d better round up the usual stretch wraps because this is the beginning of beautiful free shipping.
Entertainment Biweekly raves: “Pretentious and trite, an exercise in self-aggrandizement, but the theater had popcorn with the cheese powder so I ended up enjoying the experience.”
Starring Handwrap Bogart and Directed by Machinewrap Curtiz
Rated NC-17 for No Cast film under 17 gauge sold
Beauty and the Beard Covers
Bouffant Cap is a young woman in a small village who dreams of something greater. Despite advances from the local hunk and hunter Hard Hat-ston, Bouffant finds refuge in the safety manuals at the library and her eccentric inventor father, Mob Cap. When her father goes missing one night, Bouffant journeys to the remote and cursed Disposable Castle to find him imprisoned by the claws of the Beard Cover Beast. Bouffant offers to take her father’s place as the Beast’s prisoner, which the Beast accepts. Over the next few weeks, slowly yet surely, Bouffant and the Beard Cover Beast develop a rapport with each other that soon turns into love. However, Hard Hat-ston eventually discovers their love and, enraged with jealousy, stirs up an angry mob to storm the castle. Can the Disposable Castle fend off the OSHA-violating mob of villagers? Will Bouffant and the Beard Cover Beast’s love persevere? This Valentine’s Day, be our guest and put our safety supplies to the test!
Variety Fair declares: “I am a Nigerian prince and if you could kindly provide me your bank account information, I will transfer $20 million to your checking or savings account.”
Starring Jerry Oversleevesbach and Directed by Sydney Polypropylene
Rated G for Great safety supplies only at PackagingSuppliesByMail
-
January 26, 2024
When you’re in pain, you want relief and you want it now. Thankfully, we have devised ways to use temperature to provide fast pain relief. In fact, from saunas to ice baths, we have been using heat and cold therapies for centuries. These days, when we’re looking for quick and convenient pain relief, we reach for our hot packs and cold packs.
Hot and cold packs are either pressure-activated or kept in heated/chilled environments until they are needed. These tools of thermotherapy are a staple at home, schools, and work, but they are also not without their risks. This article will cover the recommended uses for hot packs and cold packs, as well as some things to watch out for.
Hot Packs
Benefits
Heat is primarily used to release tension and encourage blood flow. Therefore, hot packs are typically applied to muscles that are either stiff and tense or muscles enduring spasms. The constant heat loosens stiff muscles and increases the flow of blood in the specific area it is held to, reducing the intensity and frequency of spasms over time. Hot packs are also great for muscle pain that is chronic and long-lasting.
Risks
The most common risk associated with heat therapy is burning. A heat pack that is running too hot or held in one spot for too long can impart burns on the area of the skin it is in contact with. This can exacerbate the current problem and/or introduce new ones. Speaking of which, those dealing with an infection need to be careful when using a hot pack, as it can encourage the infection to spread more rapidly throughout the body.
Medical professionals recommend using a hot pack for no longer than 20 minutes at a time and avoiding using one within the first 48 hours of a minor injury.
Cold Packs
Benefits
Cold is primarily used to reduce swelling, inflammation, and blood flow. Unlike hot packs, cold packs are recommended for new or renewed injuries. The constant cold restricts blood flow and numbs the area of the skin it contacts, helping to ease the pain and minimize any bleeding. Cold packs are also great for relieving sore and achy muscles.
Risks
Improper use of cold packs can result in skin, tissue, and nerve damage. Similar to the risks associated with winter, cold packs that are kept in place for too long will prevent proper blood flow to various parts of the body. Without the necessary amount of blood and body heat, the area that is in contact with the cold pack will lose strength and begin sustaining damage inside and out.
Medical professionals recommend using a cold pack for no longer than 20 minutes at a time.
Running Hot and Cold
Heat and cold are important forces in our lives. They not only dictate what we wear and how we live, but they can also provide much-needed pain relief in critical situations. Whether you need to loosen muscles and increase blood flow, or reduce swelling and decrease blood flow, hot and cold packs are great tools for taking the hurt out of being hurt. As long we stay aware of the risks and restrict usage to 20-minute intervals, thermotherapy can serve us well.
If you’d like to learn more about hot packs and cold packs, the Cleveland Clinic has a great article on thermotherapy, covering its use for specific conditions like arthritis and tendinitis.
While you’re here, be sure to check out our wide selection of medical supplies, including hot and cold therapy products. Orders of medical supplies over $150 come with free shipping, so you can provide some quick and convenient pain relief today!
For further reading on our medical supplies, we have an article on first aid kits, detailing what goes in them and how to use them.
Hot Packs
Cold Packs
Stiff, tense, or tight muscles
Chronic, long-lasting pain
Reduces muscle spasms
Boosts blood flow to applied area
Risk of burning skin
Risk of spreading a present infection
Achy muscles
New or renewed injuries
Numbs pain
Reduces swelling and inflammation
Reduced blood flow to applied area
Risk of skin, tissue, nerve damage
